Preparing Garden Soil in Spring: When and How to Get Beds Ready for Planting
A step-by-step guide to timing, testing, amending, and preparing healthy soil for a productive growing season
Spring soil preparation sets the foundation for the entire growing season. Healthy soil supports strong roots, efficient water use, and steady nutrient availability — all essential for productive organic gardens. Preparing beds correctly also prevents compaction, drainage problems, and poor plant growth later in the year.
This guide explains when soil is ready to work, how to prepare it using organic methods, and what to do before planting begins.
Why Spring Soil Preparation Matters
Winter leaves soil compacted, depleted, and often covered with debris. Proper spring preparation restores structure and fertility so plants can establish quickly.
Key benefits include:
- Improved drainage and aeration
- Better root penetration
- Increased microbial activity
- More consistent moisture retention
- Reduced risk of disease and pests
- Improved nutrient availability
Organic gardening relies heavily on soil health rather than synthetic inputs. Investing time in preparation pays off all season.
Related: March Gardening Checklist by USDA Zone
When Soil Is Ready to Work
Working soil too early is one of the most common gardening mistakes. Wet soil compacts easily, destroying the air spaces plant roots need. Once compacted, soil structure can take an entire season — or longer — to recover.
The Simple Squeeze Test
The most reliable readiness check requires nothing but your hand.
- Pick up a handful of soil from a few inches below the surface.
- Squeeze it firmly into a ball.
- Open your hand.
Interpret the results:
- If the soil crumbles easily, it is ready to work.
- If it holds together but breaks apart with light pressure, it is nearly ready.
- If it stays in a solid lump or feels sticky, it is still too wet.
Dropping the ball from waist height is another test. If it shatters, conditions are suitable.
Signs Soil Is Still Too Wet
Avoid working soil if you notice:
- Mud sticking to tools or boots
- A slick or glossy surface
- Water filling footprints
- Soil that ribbons or smears when rubbed
Working soil under these conditions can create hard clods that bake in the sun and resist later improvement.
Soil Temperature Considerations
Even if soil is dry enough, very cold soil slows root growth and microbial activity. Cool-season crops tolerate colder conditions, but warm-season vegetables require warmer soil.
Raised beds typically warm and dry faster than in-ground beds, allowing earlier preparation.
Differences by Soil Type
Clay soil
Dries slowly and compacts easily. It must be handled carefully and never worked when wet.
Sandy soil
Drains quickly and can often be worked earlier, but it may dry out too fast without added organic matter.
Loam soil
Balances drainage and moisture retention and is usually easiest to prepare.
Step-by-Step Spring Soil Preparation
Once soil passes the readiness test, preparation can begin.
1. Clear Debris and Weeds
Remove:
- Dead plant material
- Fallen branches and stones
- Old mulch layers that have not decomposed
- Emerging weeds
Clearing debris reduces places for pests and diseases to overwinter and allows soil to warm evenly.
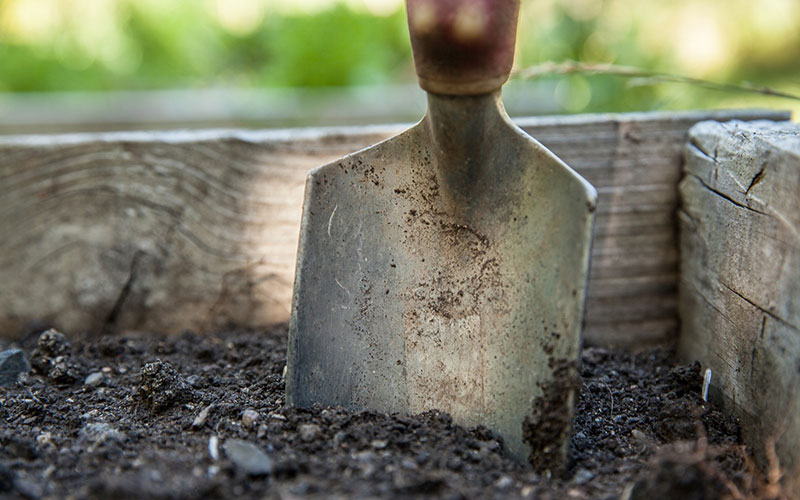
2. Loosen the Soil Carefully
Loosen soil to a depth of about 6 to 12 inches, depending on crop needs.
Options include:
- Garden fork (preferred for organic gardens)
- Broadfork for minimal soil disturbance
- Shovel for compacted areas
Avoid excessive tilling. Overworking soil destroys structure and beneficial organisms. The goal is to loosen, not pulverize.
Never step on prepared beds, as foot traffic quickly re-compacts soil.
3. Add Organic Matter
Organic matter is the single most important spring amendment.
Common options:
- Finished compost
- Aged manure (well-rotted)
- Leaf mold
- Fully decomposed plant material
Spread 2 to 3 inches across the surface and mix it into the top layer of soil. Organic matter improves:
- Soil structure
- Nutrient content
- Water retention in sandy soils
- Drainage in clay soils
- Biological activity
Avoid fresh manure immediately before planting, as it can burn plants and introduce pathogens.
4. Level and Shape Beds
Use a rake to smooth the surface and break remaining clumps. Form beds slightly raised above surrounding soil to improve drainage.
Defined beds also help prevent accidental compaction by keeping foot traffic in pathways.
Preparing Different Soil Types
Clay Soil
Clay soils benefit most from added organic matter. Compost helps create air spaces and improves drainage over time.
Best practices:
- Work only when properly dry
- Add generous compost each year
- Consider raised beds if drainage is poor
Sandy Soil
Sandy soils drain quickly and lose nutrients easily.
Improve performance by:
- Adding large amounts of organic matter
- Using compost to increase water retention
- Applying mulch after planting to reduce evaporation
Loam Soil
Loam is naturally fertile and balanced but still benefits from annual compost additions to maintain structure and nutrients.
Raised Beds vs. In-Ground Gardens
Raised beds offer several spring advantages:
- Warm up faster
- Drain excess water more efficiently
- Allow earlier planting
- Require less heavy digging
Most raised beds benefit from a yearly top-dressing of compost rather than deep turning.
In-ground gardens may need more time to dry and warm, especially in heavy soils.
Common Spring Soil Preparation Mistakes to Avoid
Avoid these errors to protect soil health:
- Working soil while wet
- Walking on prepared beds
- Over-tilling or pulverizing soil
- Adding fresh manure just before planting
- Ignoring soil fertility needs
- Removing too much topsoil with aggressive digging
Good preparation is about improving structure, not simply turning soil over.
What to Do After Preparing the Soil
After beds are prepared:
- Allow soil to settle for several days before planting
- Water lightly if conditions are very dry
- Add mulch after seedlings are established
- Keep foot traffic off beds
- Cover soil if heavy rain is expected
If planting will be delayed, a temporary cover such as mulch or fabric can prevent erosion and compaction.
Final Thoughts
Preparing garden soil in spring is one of the most important tasks of the year. Taking the time to wait for proper conditions, improve organic matter, and handle soil gently creates a strong foundation for healthy plants and abundant harvests.
Healthy soil improves year after year when managed carefully. Each spring’s preparation builds long-term fertility, resilience, and productivity in the garden.